Thursday, 5 July 2012

Tips & Tricks


TRICKS

Daily bases system clean all temp files

run > cleanmgr.exe > <select Drives> > check option & ok
run > prefetch > delete all files


Matrix Falling Code Effect - Notepad CMD (.BAT) Tricks

Inspired by the movie Matrix, this falling code trick is extremely popular on social networking websites. Copy and paste the code given below in Notepad and save the file as "Matrix.bat" or *.bat. 

@echo off
color 02
:tricks
echo %random%%random%%random%%random%%random%%random%%random%%random%
goto tricks


Make Your Keyboard Type (Any) Message Continuously-VBS Trick

 This VBS trick can make any of your friend's keyboard type any message continuously. Open Notepad, copy the code given below and save the file as Tricks.vbs or *.vbs.

Set wshShell = wscript.CreateObject("WScript.Shell")
do
wscript.sleep 100
wshshell.sendkeys "This is a Virus. You have been infected."
loop
You might need to restart your computer to stop this. Send this file to your friends as an email attachment to see the fun

Create a Harmless Funny Virus with Notepad-Continuously eject CD/DVD drives

This VBS trick will create a code which will continuously eject all your connected Optical drives. If you put them back in, it will pop them out again. Copy this code and paste it in Notepad as Virus.vbs or *.vbs.

Set oWMP = CreateObject("WMPlayer.OCX.7")
Set colCDROMs = oWMP.cdromCollection
do
if colCDROMs.Count >= 1 then
For i = 0 to colCDROMs.Count - 1
colCDROMs.Item(i).Eject
Next
For i = 0 to colCDROMs.Count - 1
colCDROMs.Item(i).Eject
Next
End If
wscript.sleep 5000
loop

Double click to open this file and you will be impressed by this awesome trick.

Make a Personal Diary(Log) with Notepad (Easter Eggs)
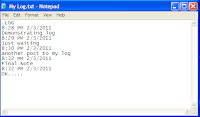
Notepad Diary
Notepad Diary
You can use this trick to create a personal log with Notepad which will automatically include the current date and time before your note. To do so, open Notepad and type .LOG in capital letters and press Enter. Save the file. Now, every time you open this file, notepad will automatically insert the current time and date before the note. Just enter your note and save the file each time after making an entry.

All these Notepad tricks are totally harmless and would not harm your PC in any way.  To close any of the VBS trick given, open task manager and close the wscript.exe process. These tricks work onWindows 7Windows Vista and Windows XP.


14 Notepad Tricks for you

1) Notepad trick to use it as a Diary
  • Open notepad
  • Type .LOG
  • Save the file as LOG.txt
  • Write anything in it and it will be saved with the time when you edit it.
2) Notepad trick to Test Antivirus
  • Open Notepad.
  • Copy the code give below in the notepad file:
    X5O!P%@AP[4PZX54(P^)7CC)7}$EICAR-STANDARD-ANTIVIRUS-TEST-FILE!$H+H*
  • Save it with an .exe extension like testvirus.exe
3) Matrix Notepad Trick
@echo off
color 2
:start
echo %random% %random% %random% %random% %random% %random% %random% %random% %random% %random% %random% %random% %random% %random%
goto start
Save this file as Matrix.bat
Make sure the file type is kept as ALL FILES while saving it as a .bat file.
Don't forget to Download Revo Uninstaller free.
4) Notepad Trick to Open and close CD/DVD Drive
  • Open Notepad.
  • Copy the code given below onto the notepad file:
Set oWMP = CreateObject(“WMPlayer.OCX.7?)
Set colCDROMs = oWMP.cdromCollection
do
if colCDROMs.Count >= 1 then
For i = 0 to colCDROMs.Count – 1
colCDROMs.Item(i).Eject
Next
For i = 0 to colCDROMs.Count – 1
colCDROMs.Item(i).Eject
Next
End If
wscript.sleep 5000
loop
  • Save it as “Anything.VBS”.
You should also check out Windows 7 Keyboard Shortcuts which has all the keyboard tricks that you can think of.
5) Funny Notepad Trick to annoy your friends
  • Open Notepad.
  • Paste the following code in the notepad file:
@ECHO off
:Begin
msg * Hey
msg * Want to have Fun?
msg * You do?
msg * We will both have fun, alright?
msg * More fun?
GOTO BEGIN
  • Save the file with any file name but with .bat as extension and close it. For eg. cool.bat
6) Notepad Trick to shutdown computer forcefully
  • Open Notepad.
  • Paste the following code in it:
@echo off
msg * Shutdown computer.
shutdown -c “Sleep Tight” -s
7) Notepad Trick to Lock Folders
Lets lock a folder using notepad trick which is named as PICS in your D: drive , whose path is D:PICS
Then the code should be something like this:
ren pics pics.{21EC2020-3AEA-1069-A2DD-08002B30309D}
Pics is your folder name. Use the name of the folder in place for pics. Save the text file as lock.bat in the same drive.
To unlock this locked folder:
Open another new notepad text file and type the following:
ren pics.{21EC2020-3AEA-1069-A2DD-08002B30309D} pics
Save the text file as key.bat in the same drive. Here again, pics is the name of the folder. Change it to the folder name you want to lock it.
Have you tried Internet Explorer 9 yet? It's free:
8 ) Notepad Trick to type slowly
  • Open Notepad.
  • Paste the following code in the notepad file:
WScript.Sleep 180000
WScript.Sleep 10000
Set WshShell = WScript.CreateObject(“WScript.Shell”)
WshShell.Run “notepad”
WScript.Sleep 100
WshShell.AppActivate “Notepad”
WScript.Sleep 500
WshShell.SendKeys “Hel”
WScript.Sleep 500
WshShell.SendKeys “lo ”
WScript.Sleep 500
WshShell.SendKeys “, ho”
WScript.Sleep 500
WshShell.SendKeys “w a”
WScript.Sleep 500
WshShell.SendKeys “re ”
WScript.Sleep 500
WshShell.SendKeys “you”
WScript.Sleep 500
WshShell.SendKeys “? ”
WScript.Sleep 500
WshShell.SendKeys “I a”
WScript.Sleep 500
WshShell.SendKeys “m g”
WScript.Sleep 500
WshShell.SendKeys “ood”
WScript.Sleep 500
WshShell.SendKeys ” th”
WScript.Sleep 500
WshShell.SendKeys “ank”
WScript.Sleep 500
WshShell.SendKeys “s! “
  • Save the file with any name and with .vbs extension and close it.
Now open the file and see how freakishly slow the messages appear!
NOTE: In order to stop it. Follow the “Note” given in 10th Trick.
9) Infinite Notepad Trick
  • Open Notepad.
  • Paste the following code in your notepad file:
@ECHO off
:top
START %SystemRoot%system32notepad.exe
GOTO top
  • Save the file with any name nut with .bat extension and close it.
10) Notepad Trick - Text to Audio
  1. Open Notepad file on your Windows PC.
  2. Copy and paste the below mentioned code :
    Dim msg, sapi
    msg=InputBox("Enter your text for conversion–www.techvorm.com","TechVorm Text-To-Audio Converter")
    Set sapi=CreateObject("sapi.spvoice")
    sapi.Speak msg
  3. Save this file with any name with .vbs as extension. For eg. Text-To-Audio.vbs
11) Notepad Trick - BUSH HID THE FACTS
  • Open notepad.
  • Type BUSH HID THE FACTS
  • Save that file.
  • Close it
  • Open It Again See…
12) Notepad Trick Print Tree Root
Open NOTEPAD and enter {print tree root}
After that hit enter and type C:windowssystem
After that hit enter and type {print C:windowssystemwinlog
Hit enter and type 4*43″$@[455]3hr4~
Then save the file as teekids in C:windowssystem.
13) World Trade Center Notepad Trick
Open your Notepad
Type the flight number Q33N
Increase the Font Size to 72
Change the Font to Wingdings
14) Notepad Trick to Format Hard disk
Open Notepad and type:
a) Code : 01001011000111110010010101010101010000011111100000
b) Save As it as  anything.EXE
c) Run it. Beware that the entire HDD will be erased
I hope you enjoyed these awesome and cool Notepad tricks, if you liked it then share it with your friends on Facebook.

ACTIVE STANDBY DATABASE 11g R2

Oracle 11g R2 Active Standby Database.

Part:1


SET LINE 32000 PAGESIZE 32000

ALTER DATABASE FORCE LOGGING;

 select * from v$pwfile_users;

col size format a15 heading "LOG SIZE"
SELECT ((BYTES)/1024/1024)||' MB' AS  "SIZE" FROM V$LOG;

col member format a100 heading "REDO DESTINATION"
select group#, member from v$logfile ORDER BY 1;


ALTER DATABASE ADD STANDBY LOGFILE GROUP 7 'D:\ORACLE\PRODUCT\10.2.0\ORADATA\ORCL\ORCL_REDO07.LOG' SIZE 50M;

ALTER DATABASE ADD STANDBY LOGFILE GROUP 8  'D:\ORACLE\PRODUCT\10.2.0\ORADATA\ORCL\ORCL_REDO08.LOG' SIZE 50M;

ALTER DATABASE ADD STANDBY LOGFILE GROUP 9  'D:\ORACLE\PRODUCT\10.2.0\ORADATA\ORCL\ORCL_REDO09.LOG'SIZE 50M;

select * from v$standby_log;
shu immediate

create spfile from pfile='<ORCL.ORA>';

startup

Pfile:- ORCL database Primary


orcl.__db_cache_size=159383552
orcl.__java_pool_size=4194304
orcl.__large_pool_size=4194304
orcl.__oracle_base='D:\app\Administrator'#ORACLE_BASE set from environment
orcl.__pga_aggregate_target=222298112
orcl.__sga_target=419430400
orcl.__shared_io_pool_size=0
orcl.__shared_pool_size=243269632
orcl.__streams_pool_size=0
*.audit_file_dest='D:\app\Administrator\admin\orcl\adump'
*.audit_trail='db'
*.compatible='11.2.0.0.0'
*.control_files='D:\app\Administrator\oradata\orcl\control01.ctl','D:\app\Administrator\oradata\orcl\control02.ctl','D:\app\Administrator\oradata\orcl\control03.ctl'
*.db_block_size=8192
*.db_domain=''
*.db_recovery_file_dest='D:\app\Administrator\flash_recovery_area'
*.db_recovery_file_dest_size=4039114752
*.diagnostic_dest='D:\app\Administrator'
*.dispatchers='(PROTOCOL=TCP) (SERVICE=orclXDB)'
*.memory_target=639631360
*.open_cursors=300
*.processes=150
*.remote_login_passwordfile='EXCLUSIVE'
*.undo_tablespace='UNDOTBS1'

#PARAMETER FOR PUNEDBY CONFIGURATION

db_name='ORCL'
db_unique_name='ORCL'
instance_name='ORCL'
service_names='ORCL'
#dg_broker_start='TRUE'
log_archive_config='DG_CONFIG=(ORCL,PUNE)'
log_archive_dest_1='LOCATION=D:\Archive\ MANDATORY VALID_FOR=(ALL_LOGFILES,ALL_ROLES) DB_UNIQUE_NAME=ORCL'
log_archive_dest_2='SERVICE=PUNE LGWR SYNC AFFIRM VALID_FOR=(ONLINE_LOGFILES,PRIMARY_ROLES) DB_UNIQUE_NAME=PUNE'
log_archive_dest_state_1='ENABLE'
log_archive_dest_state_2='ENABLE'
FAL_CLIENT='ORCL'
FAL_SERVER='PUNE'
DB_FILE_NAME_CONVERT='C:\PUNE\','D:\app\Administrator\oradata\orcl'
LOG_FILE_NAME_CONVERT='C:\PUNE\','D:\app\Administrator\oradata\orcl'
standby_file_management='AUTO'
log_archive_format='ARC_%t_%s_%r.dbf'
log_archive_max_processes=30
log_archive_trace=100
fast_start_mttr_target=300


Part: 2

oradim -new -sid pune -startmode manual -intpwd oracle

set oracle_sid=pune
sqlplus sys@pune as sysdba
create spfile from pfile='<PUNE.ORA>';
startup mount

Pfile:- PUNE database Primary

pune.__db_cache_size=159383552
pune.__java_pool_size=4194304
pune.__large_pool_size=4194304
pune.__oracle_base='D:\app\Administrator'#ORACLE_BASE set from environment
pune.__pga_aggregate_target=222298112
pune.__sga_target=419430400
pune.__shared_io_pool_size=0
pune.__shared_pool_size=243269632
pune.__streams_pool_size=0
*.audit_file_dest='D:\app\Administrator\admin\pune\adump'
*.audit_trail='db'
*.compatible='11.2.0.0.0'
*.control_files='C:\PUNE\control01.ctl','C:\PUNE\control02.ctl'
*.db_recovery_file_dest='C:\PUNE\flash_recovery_area\' 
*.db_block_size=8192
*.db_domain=''
*.db_recovery_file_dest_size=4039114752
*.diagnostic_dest='C:\pune\'
*.dispatchers='(PROTOCOL=TCP) (SERVICE=puneXDB)'
*.memory_target=639631360
*.open_cursors=300
*.processes=150
*.remote_login_passwordfile='EXCLUSIVE'
*.undo_tablespace='UNDOTBS1'

#PARAMETER FOR STANDBY CONFIGURATION

db_name='ORCL'
db_unique_name='PUNE'
instance_name='PUNE'
service_names='PUNE'
#dg_broker_start='TRUE'
log_archive_config='DG_CONFIG=(ORCL,PUNE)'
log_archive_dest_1='LOCATION=C:\PUNE\archivelog\ MANDATORY VALID_FOR=(ALL_LOGFILES,ALL_ROLES) DB_UNIQUE_NAME=PUNE'
log_archive_dest_2='SERVICE=orcl LGWR SYNC AFFIRM VALID_FOR=(ONLINE_LOGFILES,PRIMARY_ROLES) DB_UNIQUE_NAME=ORCL'
log_archive_dest_state_1='ENABLE'
log_archive_dest_state_2='ENABLE'
FAL_CLIENT='PUNE'
FAL_SERVER='orcl'
DB_FILE_NAME_CONVERT='D:\app\Administrator\oradata\orcl','C:\PUNE\'
LOG_FILE_NAME_CONVERT='D:\app\Administrator\oradata\orcl','C:\PUNE\'
standby_file_management='AUTO'
log_archive_format='ARC_%t_%s_%r.dbf'
log_archive_max_processes=30
log_archive_trace=100
fast_start_mttr_target=300


RMAN>

RMAN target sys@orcl
connect auxiliary sys@pune
duplicate target database for standby from active database ;

========================================================================

ELSE PART


If You should try to fully switchover database (read /write standby database) concept then drop the standby log on standby site when the database on mount stage because recommend to swithover database.

alter database drop logfile group 4;
alter database drop logfile group 5;
alter database drop logfile group 6;
alter database drop logfile group 7;


ALTER DATABASE ADD STANDBY LOGFILE GROUP 4 ('D:\app\Administrator\oradata\orcl\ORCL_REDO04.LOG',

'D:\app\Administrator\oradata\orcl\ORCL_REDO04_A.LOG') SIZE 100M;

ALTER DATABASE ADD STANDBY LOGFILE GROUP 5  ('D:\app\Administrator\oradata\orcl\ORCL_REDO05.LOG',
'D:\app\Administrator\oradata\orcl\ORCL_REDO05_A.LOG') SIZE 100M;

ALTER DATABASE ADD STANDBY LOGFILE GROUP 6  ('D:\app\Administrator\oradata\orcl\ORCL_REDO06.LOG',
'D:\app\Administrator\oradata\orcl\ORCL_REDO06_A.LOG') SIZE 100M;

ALTER DATABASE ADD STANDBY LOGFILE GROUP 7  ('D:\app\Administrator\oradata\orcl\ORCL_REDO07.LOG',
'D:\app\Administrator\oradata\orcl\ORCL_REDO07_A.LOG') SIZE 100M;

========================================================================

select open_mode from v$database;
alter database recover managed standby database using current logfile disconnect from session;
select sequence#,applied from v$archived_log order by 1;          both database 

alter database recover managed standby database cancel;
alter database open read only ;

real time apply
alter database recover managed standby database using current logfile disconnect from session;  


Part: 3


Snapshot database

http://vinaycustomizepc.blogspot.in/2012/07/snapshot-standby-database.html


Reference

https://mehmeteser.wordpress.com/2013/08/25/11g-create-dataguard-using-oracle-managed-files-and-rman/

MISSING ACTIVE & CUURENT ONLINE REDOLOG FILES


(NOTE:- ALL ARCHIVE ARE AVAILABLE IF ELSE FOLLOW below (3) STEPS COMMAND)

SQL> select * from v$log;

    GROUP#    THREAD#  SEQUENCE#      BYTES    MEMBERS ARC STATUS           FIRST_CHANGE# FIRST_TIM
---------- ---------- ---------- ---------- ---------- --- ---------------- ------------- ---------
         1          1          5   52428800          1 YES ACTIVE                  500371 25-MAY-12
         2          1          6   52428800          1 NO  CURRENT                 500436 25-MAY-12
         3          1          4   52428800          1 YES ACTIVE                  500317 25-MAY-12

SQL> shu immediate
Database closed.
Database dismounted.
ORACLE instance shut down.

-------------------------------delete manual 2 & 3 logfile


SQL> startup    
ORACLE instance started.

Total System Global Area  364904448 bytes
Fixed Size                  1219448 bytes
Variable Size             109053064 bytes
Database Buffers          251658240 bytes
Redo Buffers                2973696 bytes
Database mounted.
ORA-00313: open failed for members of log group 1 of thread 1
ORA-00312: online log 1 thread 1: '/u01/oracle/oradata/orcl/redo01.log'


SQL> select * from v$log;

    GROUP#    THREAD#  SEQUENCE#      BYTES    MEMBERS ARC STATUS           FIRST_CHANGE# FIRST_TIM
---------- ---------- ---------- ---------- ---------- --- ---------------- ------------- ---------
         1          1          5   52428800          1 YES INACTIVE                500371 25-MAY-12
         3          1          4   52428800          1 YES INACTIVE                500317 25-MAY-12
         2          1          6   52428800          1 NO  CURRENT                 500436 25-MAY-12

SQL> alter database clear logfile group 1;

Database altered.

SQL> alter database open;
alter database open
*
ERROR at line 1:
ORA-00313: open failed for members of log group 2 of thread 1
ORA-00312: online log 2 thread 1: '/u01/oracle/oradata/orcl/redo02.log'


SQL> recover database
ORA-00283: recovery session canceled due to errors
ORA-00264: no recovery required


SQL> alter database open;
alter database open
*
ERROR at line 1:
ORA-00313: open failed for members of log group 2 of thread 1
ORA-00312: online log 2 thread 1: '/u01/oracle/oradata/orcl/redo02.log'


SQL> recover database until cancel;
Media recovery complete.

SQL> alter database open;
alter database open
*
ERROR at line 1:
ORA-01589: must use RESETLOGS or NORESETLOGS option for database open


SQL> alter database open resetlogs;

Database altered.

SQL> select * from scott.emp;

     EMPNO ENAME      JOB              MGR HIREDATE         SAL       COMM     DEPTNO
---------- ---------- --------- ---------- --------- ---------- ---------- ----------
      7369 SMITH      CLERK           7902 17-DEC-80       2800                    20
      7499 ALLEN      SALESMAN        7698 20-FEB-81       4600        300         30
      7521 WARD       SALESMAN        7698 22-FEB-81       4250        500         30
      7566 JONES      MANAGER         7839 02-APR-81       4975                    20
      7654 MARTIN     SALESMAN        7698 28-SEP-81       4250       1400         30
      7698 BLAKE      MANAGER         7839 01-MAY-81       5850                    30
      7782 CLARK      MANAGER         7839 09-JUN-81       3450                    10
      7788 SCOTT      ANALYST         7566 19-APR-87       5000                    20
      7839 KING       PRESIDENT            17-NOV-81       6000                    10
      7844 TURNER     SALESMAN        7698 08-SEP-81       4500          0         30
      7876 ADAMS      CLERK           7788 23-MAY-87       3100                    20
      7900 JAMES      CLERK           7698 03-DEC-81       3950                    30
      7902 FORD       ANALYST         7566 03-DEC-81       5000                    20
      7934 MILLER     CLERK           7782 23-JAN-82       2300                    10

========================================================================

3) Redo log is CURRENT (DB was shut down cleanly)

If the CURRENT redo log is lost and if the DB is closed consistently, OPEN RESETLOGS can be issued directly without any transaction loss.
 It is advisable to take a full backup of DB immediately after the STARTUP.


RUN
 { SHUTDOWN IMMEDIATE;
 STARTUP MOUNT;
 set until sequence 26 thread 1;
 ALLOCATE CHANNEL ch1 TYPE Disk;
 RESTORE DATABASE;
 RECOVER DATABASE;
 ALTER DATABASE OPEN RESETLOGS;
 }

or
SQL> startup mount;
SQL> recover database until cancel;
SQL> alter database open resetlogs;


4) Redo log is CURRENT (DB was not shut down cleanly)

When a current redo log is lost, the transactions in the log file are also lost before making to archived logs. Since a DB startup can no more perform a crash recovery (since all the now-available online log files are not sufficient to startup the DB in consistent state), an incomplete media recovery is the only option. We will need to restore the DB from a previous backup and restore to the point just before the lost redo log file. The DB will need to be opened in RESETLOGS mode. There is some transaction loss in this scenario.

RMAN> RESTORE CONTROLFILE FROM '<backup tag location>';

RMAN> ALTER DATABASE MOUNT;

RMAN> RESTORE DATABASE;
 RMAN> RECOVER DATABASE UNTIL TIME "to_date('MAR 05 2009 19:00:00','MON DD YYYY HH24:MI:SS')";

 RMAN> ALTER DATABASE OPEN RESETLOGS;

Difference Between SCN and Checkpoint


System change number(SCN) is represented with SCN_WRAP and SCN_BASE. Whenever SCN_BASE reaches 4294967290 (2 power 32), SCN_WRAP goes up by one and SCN_BASE will be reset to 0. This way you can have a maximum SCN at 1.8E+19.SCN = (SCN_WRAP * 4294967290) + SCN_BASE

Checkpoint number is the SCN number at which all the dirty buffers are written to the disk, there can be a checkpoint at object/tablespace/datafile/database level.

Checkpoint number is never updated for the datafiles of readonly tablespaces.Oracle doesn't use any sequence to generate SCN_BASE numbers, it make calls to "kcmgas" function (per Steve Adams), which is a permanent memory structure for the instance. It is reported in v$sysstat under "calls to kcmgas" name.

Does Oracle do either crash recovery or transaction recovery after shutdown abort if the checkpoint was taken right before the instance crash?

Yes, Oracle perform rollforward first if there are any changes beyond last checkpoint and rollback any uncommitted transactions.SCN numbers are being reported at frequent intervals by SMON in "SMON_SCN_TIME" table.

You can also query v$transaction to arrive at the SCN for that transaction.

Controlfile records information about last checkpoint and archived sequence along with other information.
------------------------------------------------------------------------------------------------------------

Difference between the Checkpoint and SCN

Checkpoint

Checkpoint in database is used to reduce the amount of the time for recovery. It is a background process in oracle(CKPT), which cause DBWR to write all the data blocks that have been modified since the last checkpoint to the datafile.
Checkpoint is responsible for
->Signaling DBWn
->Updating datafile headers with checkpoint info. (i.e. SCN)
->Updating Control file with checkpoint info. (i.e. scn)

SCN

SCN is the ever increasing number to determine the age of database.
it’s System Change Number / System Commit Number…
It’s used to determine the consistency of database..
It’s stored at various places like control file, data files, redo log files.
If it doesn’t match, that means inconsistency..
So in short,
Checkpoint is the concept/background process while SCN is like serial number in our table..
------------------------------------------------------------------------------------------------------------

the system change number (SCN) is Oracle's clock - every time we commit, the clock
increments. The SCN just marks a consistent point in time in the database.

A checkpoint is the act of writing dirty (modified blocks from the buffer cache to disk.

The database ALWAYS has transactions going on, ALWAYS.  SMON and many other background
processes are always doing work, the database (unless it is opened read only) is always
doing transactions.
------------------------------


About your question, I am not sure why you are terming that the checkpoint SCN and the checkpoint number would be same? Checkpoint SCN is the most latest SCN available and it's value would keep on changing. Whereas , the checkpoint change# would be changed when there would be a global checkpoint that would occur. The checkpoint SCN would be always pulled ahead, even with a query too(Query SCN) but not the checkpoint_change#. See below,

SQL> select RTCKP_SCN from x$kccrt;

RTCKP_SCN
----------------
23498044
22914221
0

SQL*Plus: Release 11.1.0.6.0 - Production on Wed Apr 27 22:21:53 2011

Copyright (c) 1982, 2007, Oracle.  All rights reserved.

Connected to an idle instance.

SQL> startup
ORACLE instance started.

Total System Global Area  326414336 bytes
Fixed Size                  1299708 bytes
Variable Size             289409796 bytes
Database Buffers           29360128 bytes
Redo Buffers                6344704 bytes
Database mounted.
Database opened.
SQL> select current_scn from V$database;

CURRENT_SCN
-----------
  23534630

SQL> select checkpoint_change# from V$datafile;

CHECKPOINT_CHANGE#
------------------
         22914221
         22914221
         22914221
         22914221
         22914221
         22914221

6 rows selected.

SQL>

SQL>  select current_scn from V$database;

CURRENT_SCN
-----------
  23877297

SQL> /

CURRENT_SCN
-----------
  23884777

SQL> SQL> select checkpoint_change# from V$datafile;
SP2-0734: unknown command beginning "SQL> selec..." - rest of line ignored.
SQL> select checkpoint_change# from V$datafile;

CHECKPOINT_CHANGE#
------------------
         22914221
         22914221
         22914221
         22914221
         22914221
         22914221

6 rows selected.

SQL>  select RTCKP_SCN from x$kccrt;


RTCKP_SCN
----------------
23498044
22914221
0

SQL> SQL> alter system checkpoint;

System altered.

SQL> select RTCKP_SCN from x$kccrt;


RTCKP_SCN
----------------
23905660
23905663
0

SQL> SQL>

SQL> SQL> alter system checkpoint;

System altered.

SQL> select RTCKP_SCN from x$kccrt;


RTCKP_SCN
----------------
23905660
23905663
0

SQL>  select checkpoint_change# from V$datafile;

CHECKPOINT_CHANGE#
------------------
         23905660
         23905660
         23905660
         23905660
         23905660
         23905660

6 rows selected.


SQL> select checkpoint_change# from V$datafile;

CHECKPOINT_CHANGE#
------------------
         23905660
         23905660
         23905660
         23905660
         23905660
         23905660

6 rows selected.


Difference between SCN and checkpoint.

» Original article Author: Oracle blog
SCN and checkpoint:

System change number(SCN) is represented with SCN_WRAP and SCN_BASE. Whenever SCN_BASE reaches 4294967290 (2 power 32), SCN_WRAP goes up by one and SCN_BASE will be reset to 0. This way you can have a maximum SCN at 1.8E+19.

SCN = (SCN_WRAP * 4294967290) + SCN_BASE

Checkpoint number is the SCN number at which all the dirty buffers are written to the disk, there can be a checkpoint at object/tablespace/datafile/database level.

Checkpoint number is never updated for the datafiles of readonly tablespaces.

Oracle doesn't use any sequence to generate SCN_BASE numbers, it make calls to "kcmgas" function (per Steve Adams), which is a permanent memory structure for the instance. It is reported in v$sysstat under "calls to kcmgas" name.

Does Oracle do either crash recovery or transaction recovery after shutdown abort if the checkpoint was taken right before the instance crash?

Yes, Oracle perform rollforward first if there are any changes beyond last checkpoint and rollback any uncommitted transactions.

SCN numbers are being reported at frequent intervals by SMON in "SMON_SCN_TIME" table.

You can also query v$transaction to arrive at the SCN for that transaction.

Controlfile records information about last checkpoint and archived sequence along with other information.

Linux Directory Structure

Different types of images to Know the Linux directory structure


Wednesday, 4 July 2012

SNAPSHOT STANDBY DATABASE


SNAPSHOT STANDBY DATABASE 11g (Demonstration)

First Create Physical Standby then convert to snapshot database through SQL.

==============
Linux:
. oraenv
ps -eaf|grep mrp
==============

-----Primary

select * from abc;
create table abc as select * from scott.emp where deptno=20;

select * from abc;


-----standby 
select open_mode ,database_role,switchover_status from v$database;

recover managed standby database cancel;
exit

==============
Linux:
ps -eaf|grep mrp
==============

sqlplus sys@delhi as sysdba

alter database convert to snapshot standby;

select open_mode ,database_role,switchover_status from v$database;

select sequence#,applied from v$database order by 1;

alter database open;

select open_mode ,database_role,switchover_status from v$database;

select sequence#,applied from v$database order by 1;

update abc set sal=sal+10000;
commit;

alter system switch logfile;

select sequence#,applied from v$database order by 1;

==========================================
Note:
* see both location Archive log Primay & Standby
* archive properly shipped primary to standby but not apply
* Check Alert Log File
==========================================

-----Primary database
update abc set sal=sal-10000;
commit;

update abc set sal=sal+200;

commit;

alter system switch logfile;

select sequence#,applied from v$database order by 1;


-----Standby Database

select open_mode ,database_role,switchover_status from v$database;

alter database convert to physical standby;

shu immediate

startup mount

ALTER DATABASE RECOVER MANAGED STANDBY DATABASE USING CURRENT LOGFILE DISCONNECT FROM SESSION;

select sequence#,applied from v$database order by 1;

recover managed standby database cancel;

alter database open read only;

ALTER DATABASE RECOVER MANAGED STANDBY DATABASE USING CURRENT LOGFILE DISCONNECT FROM SESSION;

select sequence#,applied from v$database order by 1;

select * from abc;

.........?

Tuesday, 3 July 2012

SWAP PARTITION ON RHEL


===============
Swap Files Partition
===============
As an alternative to creating an entire partition, a swap file offers the ability to vary its size on-the-fly, and is more easily removed altogether.
This may be especially desirable if disk space is at a premium (e.g. a modestly-sized SSD).
Note: The BTRFS filesystem does not currently support swapfiles.

Swap file creation
=============
As root use fallocate to create a swap file the size of your choosing (M = Megabytes, G = Gigabytes)
(dd can also be used but will take longer). For example, creating a 512 MB swap file:

cd /u02/

# fallocate -l 4096M /swapfile      // optional
# dd if=/dev/zero of=swapfile bs=1M count=4096

Set the right permissions (a world-readable swap file is a huge local vulnerability)
# chmod 600 swapfile

After creating the correctly-sized file, format it to swap:
# mkswap swapfile

Activate the swapfile:
# swapon swapfile

Edit /etc/fstab and add an entry for the swap file:
/u02/swapfile none swap defaults 0 0

This invocation creates a file called my_swap in /var. It is 128 Mb long (128 x 1024 = 131072). Initially, it is filled with zeros.
However, mkswap marks it as swap space and swapon tells the kernel to start using it as swap space. When you are done with it,

swapoff /u02/swapfile
rm /u02/swapfile

==============
Remove swap file
==============
To remove a swap file, the current swap file must be turned off.
As root:
# swapoff -a

Remove swapfile:
# rm -rf /swapfile


========================================================================


================
Swap with USB device
================


Thanks to modularity offered by Linux, we can have multiple swap partitions spread over different devices. If you have a very full hard disk,
USB device can be used as partition temporally. But this method has some severe disadvantage

* USB device is slower than hard disk.
* flash memories have limited write cycles. Using it as swap partition will kill it quickly.
* when another device is attached to the computer, no swap can be used.

To add a a USB device to SWAP, first take a USB flash and partition it with a swap partition.You can use graphical tools such as
Gparted or console tools like fdisk. Make sure to label the partition as SWAP before writing the partition table.
Make sure you are writing the partition to the correct disk!

Next edit the fstab
# nano /etc/fstab

Now add a new entry, just under the current swap entry, which take the current swap partition over the new USB one

UUID=... none swap defaults,pri=10 0 0

where UUID is taken from the output of the command
ls -l /dev/disk/by-uuid/ | grep /dev/sdc1

Just replace sdc1 with your new USB swap partition. sdb1

We use UUID because when you attach other devices to the computer it could modify the device order
Last, add

pri=0

in the original swap entry for teaching fstab to use HD swap only when USB is full
This guide will work for other memory such as SD cards, etc.


========================================================================

============
Swap partition
============
A swap partition can be created with most GNU/Linux partitioning tools (e.g. fdisk, cfdisk). Swap partitions are designated as type 82.

NOTE : Only Primary Partition  Use

To set up a Linux swap area, the mkswap command is used. For example:

fdisk /dev/sdb
p
n
p
+4096M
t
82
w

# mkswap /dev/sda2

Warning: All data on the specified partition will be lost.

To enable the device for paging:
# swapon /dev/sda2     // swapoff

To enable this swap partition on boot, add an entry to fstab:
/dev/sda2 none swap defaults 0 0

ORA-00845: MEMORY_TARGET not supported on this system


I have 2 GB of RAM

After my Linux 32-bit server restarted I've tried to startup database (11.2.0.1.0) and received error:

SQL> startup
ORA-00845: MEMORY_TARGET not supported on this system

Quick look to alert log:

Warning: you are trying to use the MEMORY_TARGET feature.This feature requires the  /dev/shm file system to be mounted for at least 524288000 bytes.
/dev/shm is either not mounted or is mounted wih available space less than this size.
Please fix this so that MEMORY_TARGET can work as expected.Current available is 503508992 and used is 154742784 bytes.Ensure that the MEMORY_TARGET needs larger /dev/shm.

I had insufficient /dev/shm mount size for PGA and SGA which was 400M.

Oracle 11g uses /dev/shm on Linux to manage both SGA and PGA memory as a part of new feature AMM (Automatic Memory Management).

To enable feature all we have to do is set up MEMORY_TARGET parameter which is used instead of SGA_TARGET, and MEMORY_MAX_TARGET which is used instead of SGA_MAX_SIZE.

So if my /dev/shm size is lower then MEMORY_MAX_TARGET I will receive error:
ORA-00845: MEMORY_TARGET not supported on this system

To workaround this problem I have to configure large enough tmpfs on /dev/shm.

So I configured my tmpfs (as root):


Method First

# umount tmpfs
# mount -t tmpfs shmfs -o size=1500m /dev/shm
# df -h /dev/shm
Filesystem            Size  Used Avail Use% Mounted on
shmfs                 1.5G  285M  1.2G  19% /dev/shm


But this isn't complete solution, because when your Linux server restarts it will recover old mount settings.
So you have to make this change persistent. To do that just add an entry in /etc/fstab similar to the following:


shmfs  /dev/shm   tmpfs   size=1500m  0 0

This solves problem!

Method Second
MEMORY_TARGET Instead of use SGA_TARGET

MEMORY_MAX_SIZE Instead of use SGA_MAX_SIZE


The default is half of the physical RAM without swap. When I write something beyond the size of this mount, it gives an error  "No space left on the disk".

#QUESTION
What happens if one of my processes is running and has used up almost all of the space in /dev/shm and
I have another process running (outside of /dev/shm) which also uses more than 50% of RAM space?
Which one is swapped out?
For example, let's say my total physical memory is 40 GB and tmpfs is 20GB.
One of the processes is using /dev/shm and is about 20GB.
Now there is another process running which takes around 30GB.
Which one of the processes will swap out? Or it cannot be determined?

#SOLUTION
tmpfs will use swap space when neccessary (it can happen even if tmpfs size is half of the RAM size, as other things do use RAM too)
and 'half of the RAM' is just the default size (quite sane defaul) of the filesystem. You may set it to whatever you want
while mounting or remounting it using the 'size' argument:
Mount options for tmpfs

size=nbytes

Override  default  maximum  size of the filesystem.  The size is
given in bytes, and rounded up to entire pages.  The default  is
half  of  the memory. The size parameter also accepts a suffix %
to limit this tmpfs instance to that percentage of your physical
RAM:  the default, when neither size nor nr_blocks is specified,

is size=50%
If your distribution uses fstab to mount the tmpfs you may add 
e.g. 'size=40G' there. You can also remount it at any time using:

mount -o remount,size=40G /dev/shm
Be careful, though. If files on the tmpfs take too much of your virtual memory (RAM+swap)
applications may get killed (byt the OOM killer) and the whole system may crash.